Creating a new user in Active Directory is a routine task for IT-administrators. However, often it is not the only requirement as the new user may also need permissions, access rights and a home directory.
In this article, I will show you how to set up appropriate permissions for users with the help of PowerShell.
I am going to explain step by step which cmdlets I use in my script and which functions they have. If you cannot wait for the results, there is a complete version of the script at the end of the post for you. Feel free to copy.
Index
Create home directory with PowerShell
Let us start with creating a home share for a new user. For this purpose we need three variables for our script:
- User’s identity
- Complete path to the new folder
- Drive letter which the user will see in Windows Explorer
In this case I am going to set the identity of the user by adding the sAMAccountName. This will be the input parameter for the script. Next, I combine the share path and the sAMAccountName to get the complete path. After that, I simply set the drive letter. You may alter these steps of course according to your requirements:
First, I want to find out whether there is a user with this sAMAccountName in the domain at all. Therefore, I simply execute Get-AdUser and check if the returned value equals NULL. It only makes sense to continue if this isn’t the case.
Thus I can be sure within the IF statement that the user actually exists and create the Home Directory. You can do this in two steps:
- Assign a home directory and drive letter to the user
- Create the relevant directory for the user
The order doesn’t matter. By setting the relevant attributes in Active Directory with the Set-AdUser cmdlet you assign a drive letter and home directory easily. Next, I create the actual directory with New-Item. The parameter -force suppresses the query dialogue, so you do not have to confirm each time whether you really want to create the directory.
From this point you use the parameter –ea Stop explicitly in order to stop the script as soon as an error occurs.
Assign access rights
Now you can execute the script autonomously. If the user has sufficient authorizations, it will work. Nevertheless, the new registry will only have standard authorizations. This means that a user with no admin rights will not be able to create or change files or folders in his new home directory. We will grant these permissions in the next step.
To be able to proceed we need a reference to the Access Control List (ACL) of the newly created directory. The command you need is as follows:
Next, we want to add a new FileSystemAccessRule to this ACL that contains the relevant access rules. There is a corresponding .NET object which we can adjust according to the requirements. First, we define the specifications that set the authorizations and inheritances with the help of further .Net objects. In this instance, we want to authorize the user to create (and change) new files and folders. To implement, we define the following properties:
You can find an overview of all FileSystemRights which you can define here in the Microsoft Developer Network (MSDN).
Additionally, we have to define the inheritance. Normally you want the user to be able to change all the subfolders and files within as well. Hence, we define the properties as follows:
Now we have all properties necessary to create a new FileSystemAccessRule object. However, the object needs to know to whom to assign the access rights. Since we have already selected the user, we can include his Security Identifier (SID):
Simply add the new access rule to the ACL we used before.
Finally you have to update the ACL of the directory. We have to overwrite the old one with the new ACL, which consists of the old ACL and our new entry:
Results – New home directory with relevant permissions
Now we can execute the script and enter a sAMAccountName. The script will create a directory and assign the relevant permissions.
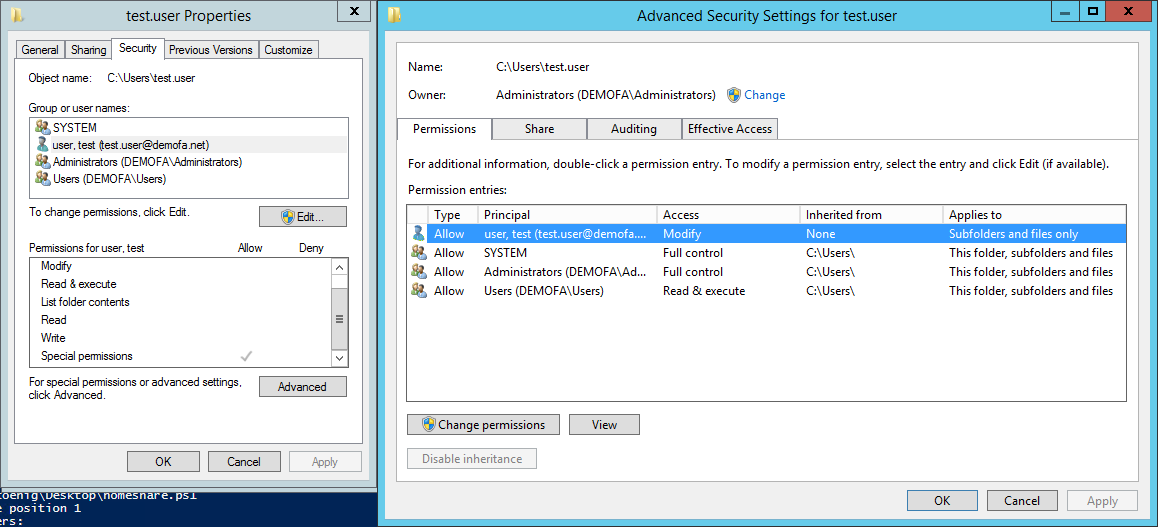
If you switch to the newly created folder, you can see the new permissions of the user in the folder settings. Unfortunately, these are displayed as „Special permissions“. However, a click on „advanced settings” will show the expected results of the script: The user has a Modify permission only.
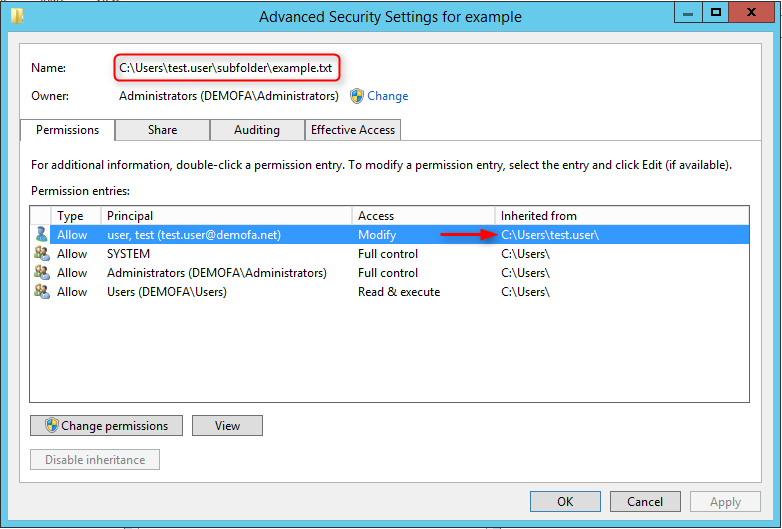
If you create subfolders and files you can go to the folder settings and see that the permissions were inherited accordingly:
Complete script
In conclusion, here is the complete script:
|
1 2 3 4 5 6 7 8 9 10 11 12 13 14 15 16 17 18 19 20 21 22 23 24 25 |
param([Parameter(Mandatory=$true)][String]$samAccountName) $fullPath = "\\srv2012r2\Users\{0}" -f $samAccountName $driveLetter = "Z:" $User = Get-ADUser -Identity $samAccountName if($User -ne $Null) { Set-ADUser $User -HomeDrive $driveLetter -HomeDirectory $fullPath -ea Stop $homeShare = New-Item -path $fullPath -ItemType Directory -force -ea Stop $acl = Get-Acl $homeShare $FileSystemRights = [System.Security.AccessControl.FileSystemRights]"Modify" $AccessControlType = [System.Security.AccessControl.AccessControlType]::Allow $InheritanceFlags = [System.Security.AccessControl.InheritanceFlags]"ContainerInherit, ObjectInherit" $PropagationFlags = [System.Security.AccessControl.PropagationFlags]"InheritOnly" $AccessRule = New-Object System.Security.AccessControl.FileSystemAccessRule ($User.SID, $FileSystemRights, $InheritanceFlags, $PropagationFlags, $AccessControlType) $acl.AddAccessRule($AccessRule) Set-Acl -Path $homeShare -AclObject $acl -ea Stop Write-Host ("HomeDirectory created at {0}" -f $fullPath) } |
Create users with a home directory automatically in AD
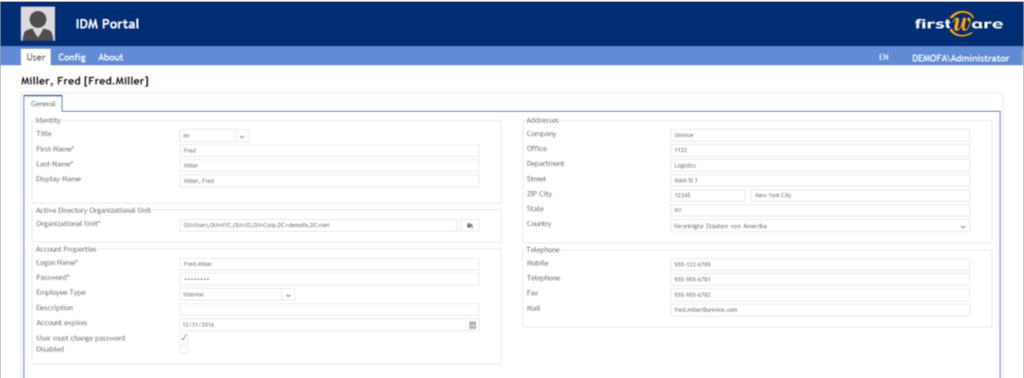
FirstWare IDM-Portal offers a very fast and easy solution for creating new users and assigning home directories.
The ProEdition enables you to integrate PowerShell scripts, like the script described in this article. In this way you can create a home directory when creating a new user.
With the help of PowerShell, FirstWare IDM-Portal also enables the automated creation of Exchange mailboxes and many other useful functionalities.
FirstAttribute AG – Your Microsoft Consulting Partner
AD Consulting | AD Migration
Please contact us for further information.








4 Comments
Leave your reply.