To synchronize login credentials between Active Directory and Azure Active Directory, many administrators use Azure AD Connect. We have already described how to synchronize on-premises Active Directory environments with Azure AD. Read the article “Install Azure AD Connect” to learn about single sign-on scenarios between on-premises networks and Azure.
In addition to Azure AD Connect, Microsoft also offers Azure AD Connect cloud sync. These are different services for similar functions.
Index
Azure AD cloud synchronization comparison
Use Azure AD Connect
In addition to the option of using Azure AD Connect, Microsoft also offers the “Azure AD cloud synchronization” service. This is another option for synchronizing users and groups between Active Directory and Azure AD. Azure AD cloud synchronization is also available in the Azure Active Directory admin center. You can access the Azure AD admin center via the URL https://aad.portal.azure.com. The Azure AD Connect and Azure AD cloud synchronization settings can be found via the “Azure Active Directory\Azure AD Connect” menu item.
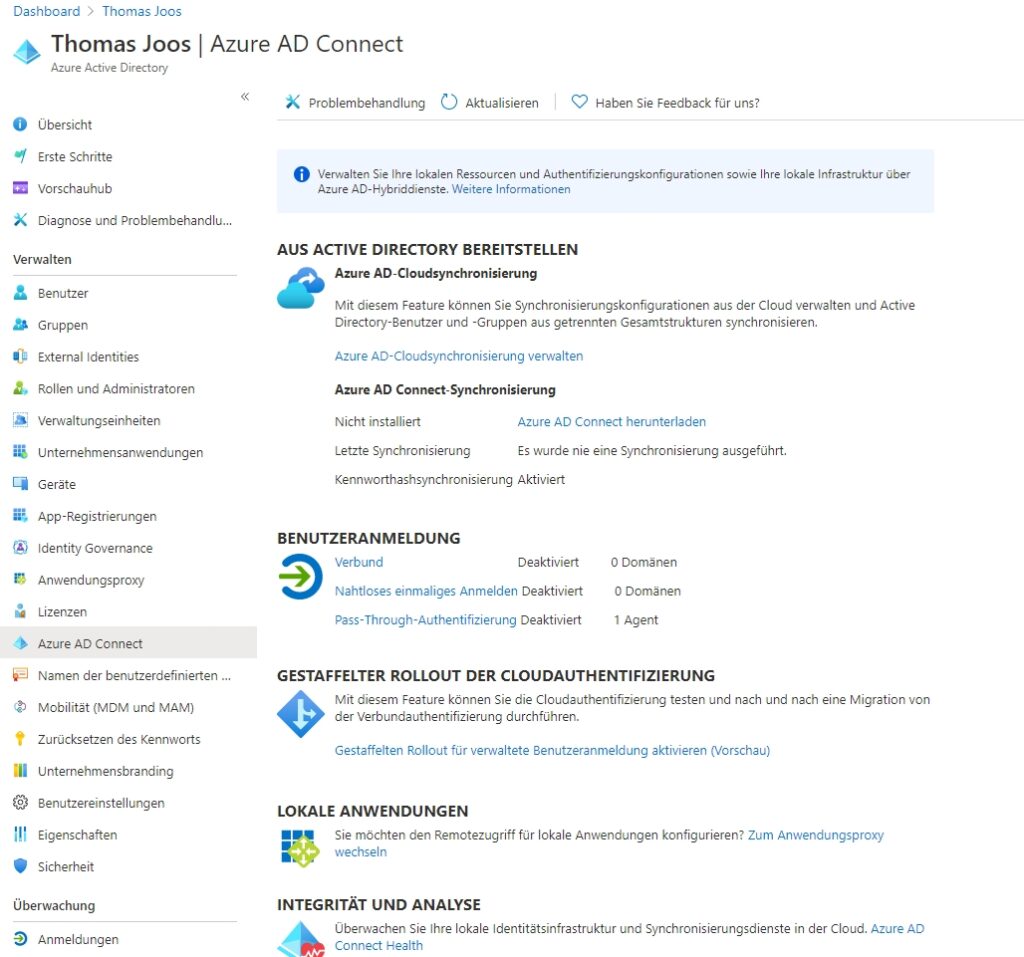
With Azure AD Connect cloud sync, you also need agent software on the network on a server that acts as a bridge between Azure AD and AD . The deployment configuration is stored in Azure AD and managed as part of the service. Unlike Azure AD Connect, the agent on the server does not handle all the actions, but all tasks are stored and performed in the cloud. The agent on the server is only used to connect Active Directory to Azure AD. It is helpful to know that Azure AD Connect cloud sync and Azure AD Connect can be used in parallel.
Azure AD Connect cloud sync vs Azure AD Connect sync
Azure AD Connect cloud sync and Azure AD Connect sync work similarly. However, only Azure AD Connect cloud sync can be run with a smaller agent. In addition, there is the option to install multiple active agents for a high-availability environment. However, if custom attributes are also to be synchronized, Azure AD Connect is (still) the better way to go, because Azure AD Connect cloud sync is not (yet) capable of doing this. Passthrough authentication is also possible when using Azure AD Connect.
Azure AD Connect cloud sync is also the better way to go when it comes to synchronizing multiple overall AD structures with an Azure subscription. Especially if the overall structures are not connected to Azure. Azure AD cloud sync supports installation on multiple servers on the network that can connect to Azure AD. This allows you to achieve high availability of the service. For the operation of the agent, a service account is created, which of course must have rights in Active Directory.
Use Managed Service Accounts
Create Group Managed Service Accounts (GMSA)
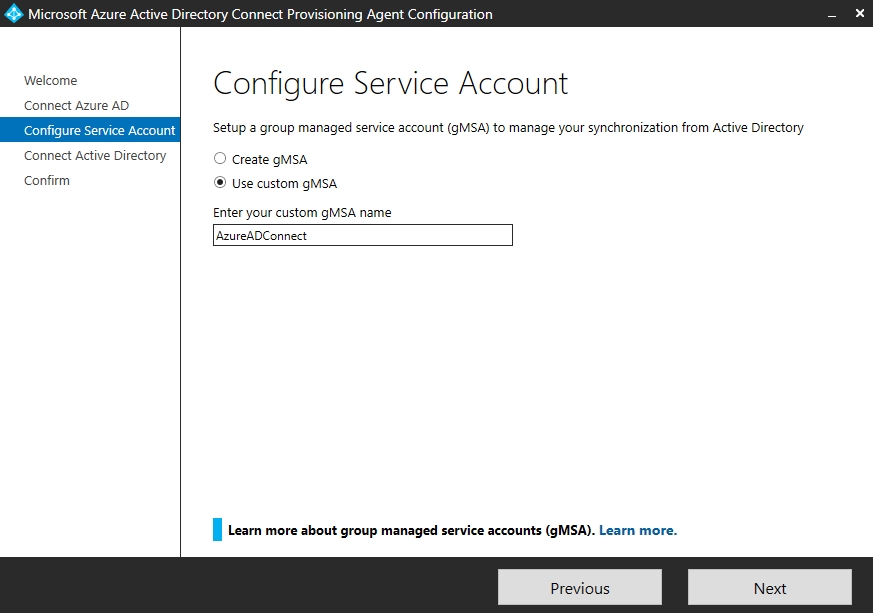
To make the installation on multiple servers easier to implement, you can also use Group Managed Service Accounts (GMSA). In this case, you use one user account for each installed instance of Azure AD cloud sync.
The account can be managed by the service itself, including changing passwords. The agent setup wizard can create a grouped managed service account. It is also possible to create such an account yourself and select it here. Managed service accounts are user accounts in Active Directory that are used for local services. The passwords of these accounts are not changed manually, but automatically by Active Directory under certain conditions. Administrators can trigger such changes manually.
The advantage is that the system services that use these user accounts do not have to be configured by administrators when passwords are changed. Instead, they take over the change of passwords automatically.
Create managed service accounts
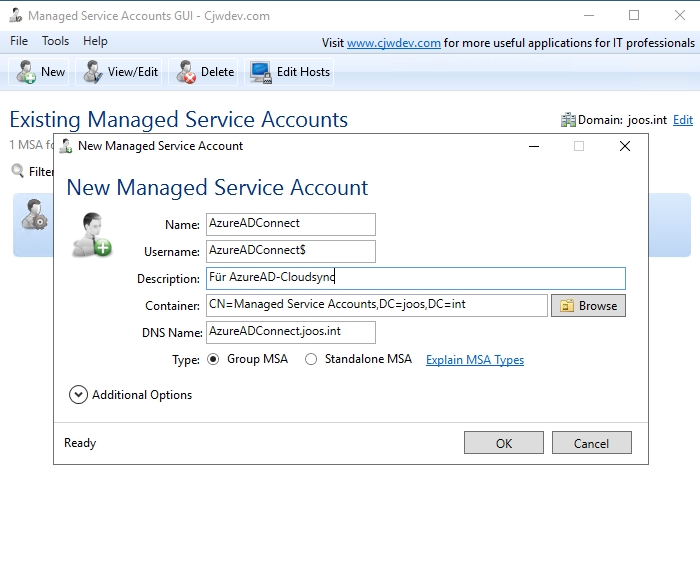
You create the service accounts via PowerShell, more precisely via the Active Directory module of PowerShell with the Cmdlet New-ADServiceAccount -name -Enabled $true , for example with New-ADServiceAccount “AzureADConnect” -Enabled $true -DNSHostName “AzureADConnect.joos.int”.
By default, the cmdlet in Windows Server 2019 creates a new grouped managed service account. Before you create grouped accounts, you must first create a new master key for the domain:
|
1 |
Add-KdsRootKey -EffectiveImmediately |
By default, it takes 10 hours from this moment until you can create managed service accounts. In test environments, you can bypass this time period with the following command:
|
1 |
Add-KdsRootKey -EffectiveTime ((Get-Date).addhours(-10)) |
The Freeware Managed Service Accounts GUI makes it much easier to create managed service accounts in Windows Server 2019.
Install Azure AD cloud synchronization
You set up Azure AD cloud synchronization from the Azure Active Directory admin center. To do this, click on “Azure Active Directory\Azure AD Connect” in the admin center (https://aad.portal.azure.com) and then on “Manage Azure AD cloud synchronization” under “Azure AD cloud synchronization”. In the window, you can click “Download Agent” to download the software. Here you can also see the status of the various agents that are already connected.

After downloading, first install the agent on a server with which you want to connect to Azure AD. After the initial setup, it is generally a good idea to install the agent on another server as well, so that synchronization always works.
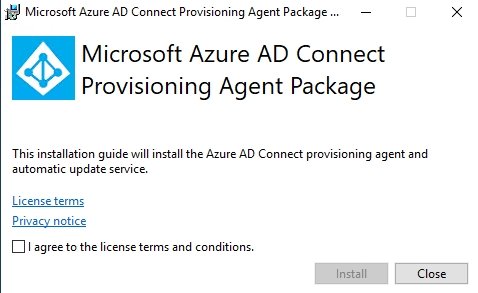
For further connection of Active Directory to Azure AD, authentication to Azure AD is still required. Here, the installation wizard also supports multifactor authentication in Azure AD. After that, you select whether you want the wizard to create a managed service account or whether you want to use an existing account.
Next, select the Active Directory domain to be synchronized with Azure AD. Here, too, a logon must take place. In the last step you get a summary and the agent starts with the setup. If something goes wrong during the setup, you can find the log files of the service in the directory „C:\ProgramData\Microsoft\Azure AD Connect Provisioning Agent\Trace“
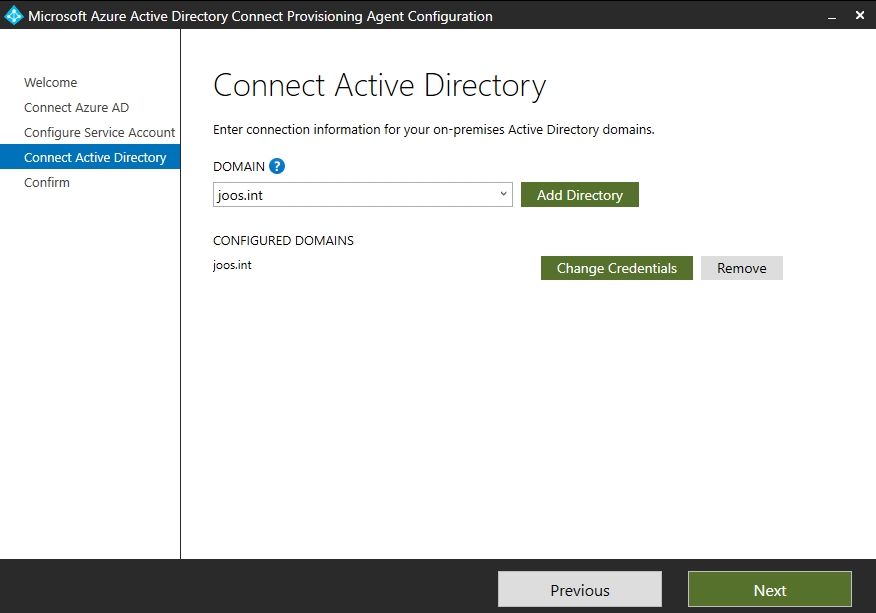
After the successful setup, you can see the connection in the Azure Active Directory admin center at “Azure Active Directory\Azure AD Connect” and then at “Azure AD cloud sync” via “Manage Azure AD cloud sync” when you click “Check all agents”.
If the synchronization does not work, check whether the “Microsoft Azure AD Connect Provisioning Agent” system service has started. The “Microsoft Azure AD Connect Agent Updater” system service must also be started.
Once the agent has connected to Azure AD, you can start the cloud sync with “New configuration” in the Azure AD Connect management interface. Here, you can select the synchronization from the domains that are connected to agents. After that, save the synchronization.
FirstAttribute AG – Identity Management & IAM Cloud Services
We would be happy to present our services and solutions to you. Get in touch and find out how we can help you.







2 Comments
Leave your reply.