There are many scenarios where credentials from on-premises Active Directory environments are synchronized with Azure Active Directory. Besides single sign-on, for the use of cloud resources in Microsoft Azure or Microsoft 365, such synchronization is also used for the deployment of Microsoft Endpoint Manager. The synchronization is done via the tool “Azure AD Connect” provided by Microsoft. First you install the tool on a server in the network, then you set up a connection with Microsoft Azure and after that, you let it synchronize the data.
Index
What does Azure AD Connect do?
Azure AD Connect can synchronize user accounts between on-premises Active Directory forests with Azure Active Directory. It can also synchronize password hashes on demand so that user accounts in Azure AD can be used to authenticate against resources in Azure and Microsoft 365. However, users do not need to re-authenticate, instead the credentials on the on-premises machine are carried over to Azure.
These are the prerequisites for using Azure AD Connect
Of course, a subscription to Microsoft Azure is required first to use Azure AD Connect. A free trial version can also be used here. The installation of the required software must take place on a server in the local data center. Here Microsoft recommends the use of a member server. The installation should not be done directly on a domain controller for security reasons, but it is possible. Azure AD Connect stores the data in an SQL database before synchronization. By default, SQL Server 2012 Express LocalDB is used here. Azure AD Connect requires a graphical user interface. Installation on a core server with Windows Server 2016/2019 is not possible.
Set up Azure AD Connect
The setup of Azure AD Connect is commenced via the Azure portal. Here, the menu item “Azure Active Directory” is available. Below “Azure Active Directory” you will again find “Azure AD Connect”. Here you can see the domains that are already connected and can also download the MSI file that you need to install in the local data center. You can also download Azure AD Connect directly from the Microsoft Download Center (https://www.microsoft.com/en-us/download/details.aspx?id=47594).
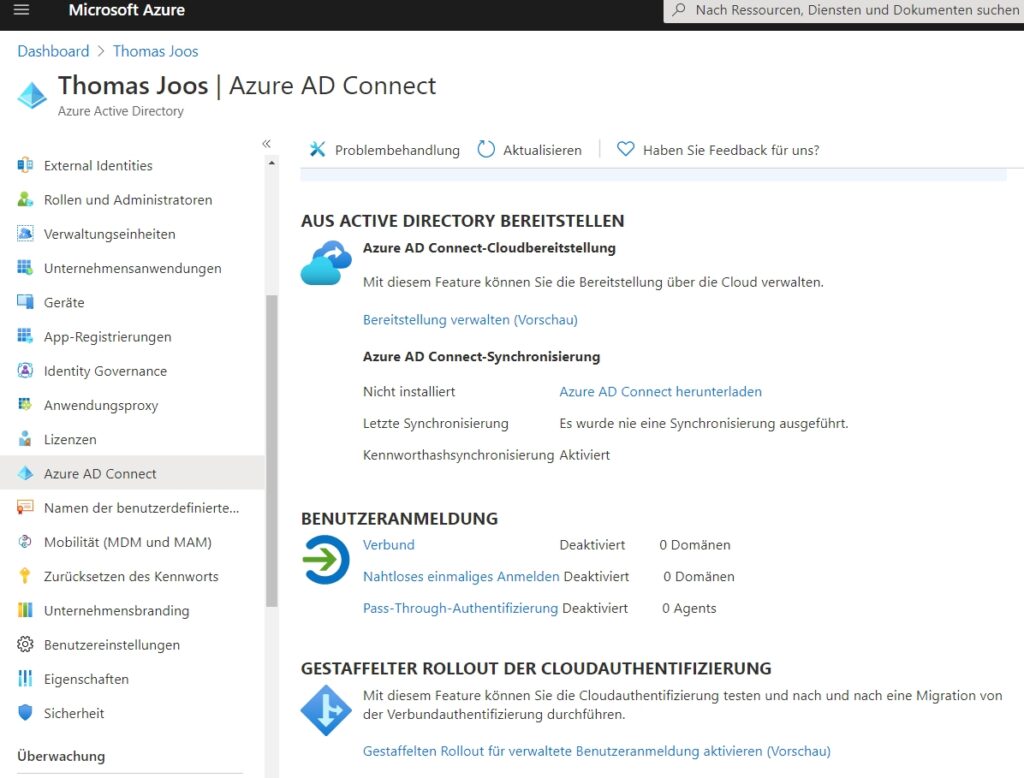
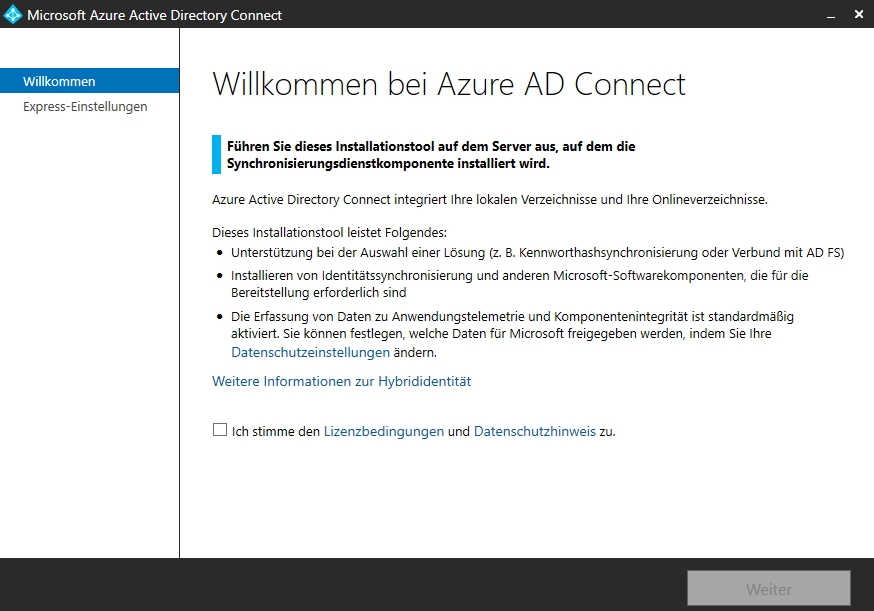
To set it up, install Azure AD Connect on the server that you want to use to synchronize the user accounts of the on-premises Active Directory forest to Azure. The setup is done via a wizard. On the first page, the wizard shows the actions that the tool can perform.
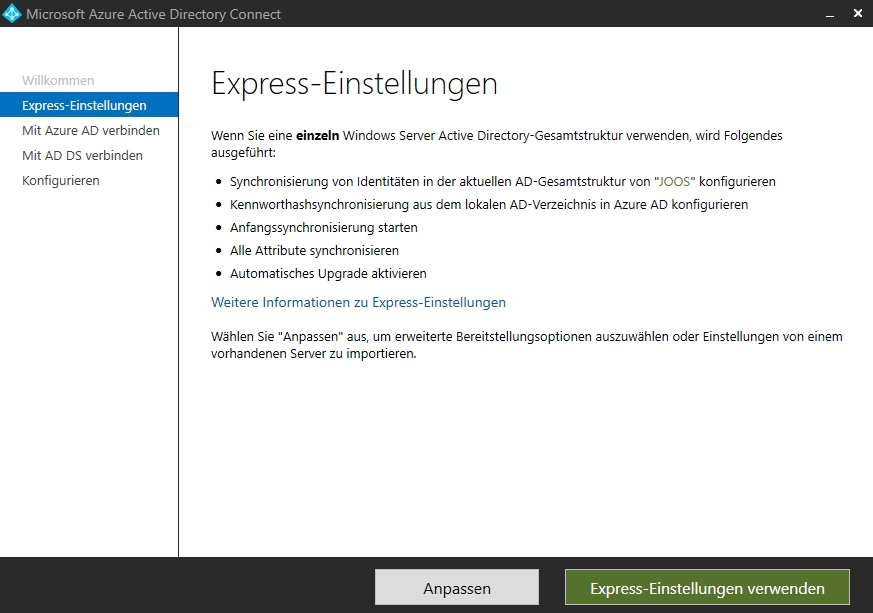
After confirming the license terms, you can select whether to use the wizard’s default settings or to customize the setup on the “Express Settings” page. In most cases, the express settings are sufficient. After selecting the express settings, the login to Azure AD takes place.
After entering the credentials for Azure AD, Azure AD Connect attempts to connect. In most cases, the connection should be established without any problems. For troubleshooting tips on connection issues, see the “Troubleshoot Azure AD connectivity” page. If the connection is successful, the next step is to enter the credentials for the on-premises Active Directory. Again, the wizard will check for a successful connection.
The wizard then checks whether the UPN suffixes of the on-premises Active Directory forest also exist in Azure AD. If you want to ensure that users can log in to Azure AD with their on-premises Active Directory login without re-entering credentials, the suffixes used should exist in both environments. You can also proceed without performing a match. After that, the wizard checks whether to proceed with the setup. The individual actions are displayed in the window:
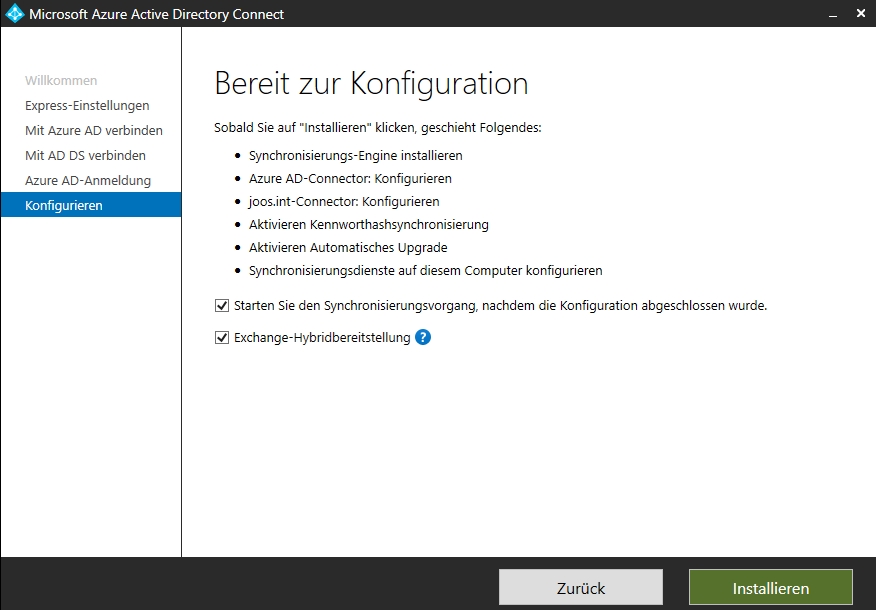
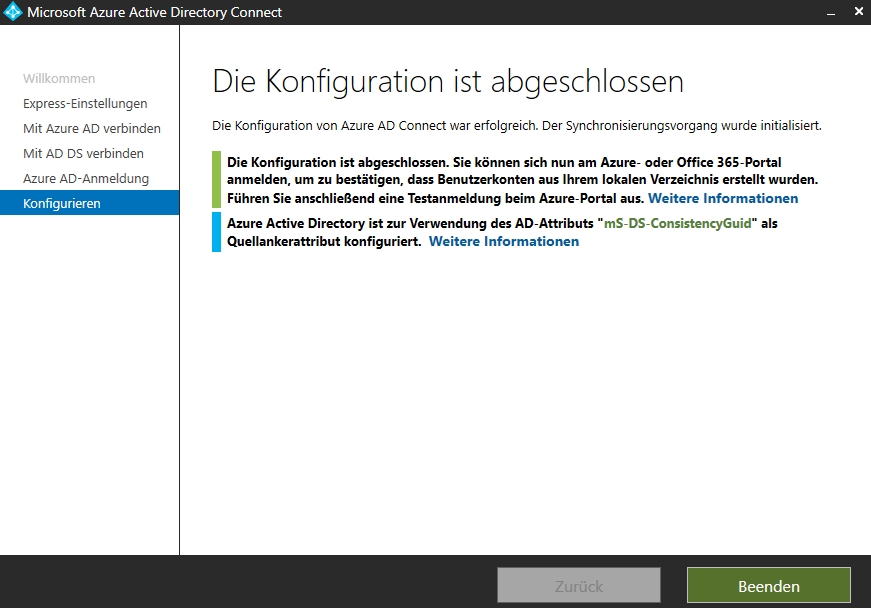
Click “Install” to continue the process and set up Azure AD Connect. Once the wizard is complete, the users will be displayed in the Microsoft 365 admin center (https://admin.microsoft.com). For “User\Active Users“, the users from the on-premises Active Directory should be displayed.
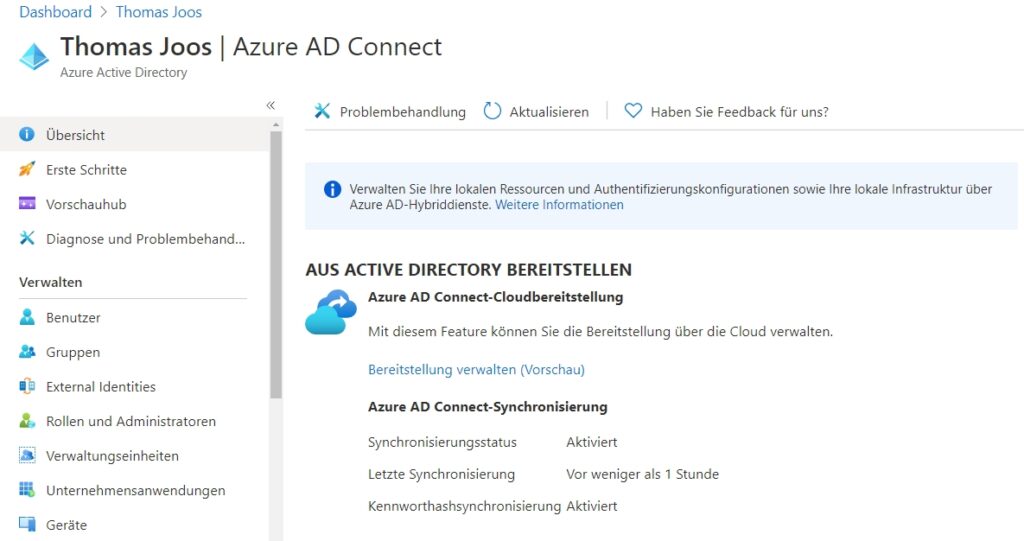
The users are also displayed in the Azure web portal. In the “Azure Active Directory\Users\All Users” area, the synchronized users can be seen. For “Azure AD Connect”, the status of the synchronization is also displayed and when the last synchronization took place.
Adjust AAD Connect configuration
The setup of Azure AD Connect can be performed on the server on which Azure AD Connect has been installed. The icon for the Azure AD Connect management program is located on the desktop. After opening it, all settings can be adjusted. To do this, select the menu item whose settings you want to adjust and click “Next”. After that, the corresponding settings can be adjusted. Before changes can be made, of course, a logon to Microsoft Azure must first be made. The login to Active Directory is pulled from the credentials of the account that logged into the computer. Via the menu item “View or export current configuration”, the configuration of Azure AD Connect can be exported to a JSON file.

Fazit
You can install Azure AD Connect quite quickly if you follow a step-by-step guide. Other granular settings should always be done with care. However, please also note that Microsoft occasionally changes features and interfaces for more recent products.
FirstAttribute AG – Identity Management & IAM Cloud Services
We would be happy to present our services and solutions to you. Get in touch and find out how we can help you.







1 Comment
Leave your reply.