The management of AD groups does not have to be in IT hands. The ‘Group-Manager’ function is often used when a non-IT employee in the company has to manage a group. For example, the department manager should be able to decide which employee is included in a certain distribution list (i.e. a distribution group).
Index
Manager can update membership list
For this purpose, the user can be entered in the Active Directory Users and Computers console as the manager of the group. We can also check the box: “Manager can update membership list”. The user can then add and remove members, but cannot edit the group.
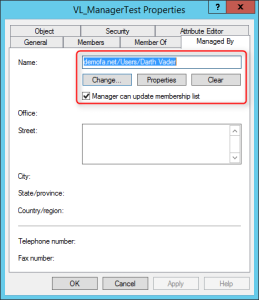
So far, so clear. But how does it work if you want to set this permission via PowerShell? This is a bit more complicated.
Group-Manager Authorization with PowerShell
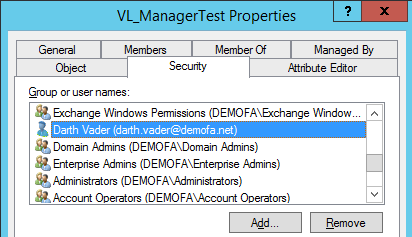
Selecting the “Manager can update membership list” checkbox does not simply mean setting an attribute on the group. Rather, it changes the ACL (Access Control List) of the group. This can also be seen in the security tab of the group. In principle, this is the same as with permissions on folders.
Let’s assume that our group is called “VL_ManagerTest”. The user who should become manager and get permissions to change members is named “dark.vader”. In our Powershell script, we proceed as follows.
Designate users as managers
First, we set this user as a manager. For this we have to fill the “managedBy” attribute of the group. However, this must contain the distinguishedName of the user. Therefore we have to find out the distinguishedName and set it. You need this script:
|
1 2 |
$user = Get-ADUser darth.vader Set-ADGroup „VL_ManagerTest“ -Replace @{managedBy=$user.DistinguishedName} |
Now the manager is set, he still needs authorizations.
Creating an AccessRule
We need to add an AccessRule for this user to the ACL of the group. To create an ActiveDirectoryAccessRule we need 4 information:
- The schema object for which this AccessRule applies.
- The SID of the user to whom the rule applies
- The type of rule (allow/deny)
- The rights that are to be set
The schema object we need here is “Self-Membership”.

Self-Membership
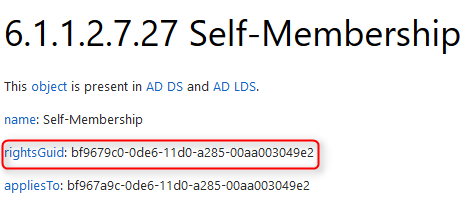
This object has a “rightsGuid” which we need for our ActiveDirectoryAccessRule. The GUID is the same across all ADs and can be found in the ADSI edit under
Configuration -> Extended Rights -> Self-Membership -> Properties -> rightsGuid
However, a quick Google search leads to the same result:
So the first thing we do is store this GUID in a variable.
|
1 |
$guid = [guid]'bf9679c0-0de6-11d0-a285-00aa003049e2' |
SID of the user
The next information we need is the SID of the user. Since we already read this out earlier, we just need to convert the type from String to SecurityIdentifier.
|
1 |
$sid = [System.Security.Principal.SecurityIdentifier]$user.sid |
We need two more information; the type of access and the permissions we want to set.
Access rights of the user
The type of access is clear: certain permissions should be allowed. The permissions that are needed here are “Write” and “Extended Rights“. And this is how it looks in PowerShell:
|
1 2 |
$ctrlType = [System.Security.AccessControl.AccessControlType]::Allow $rights = [System.DirectoryServices.ActiveDirectoryRights]::WriteProperty -bor [System.DirectoryServices.ActiveDirectoryRights]::ExtendedRight |
Now that we have all the information we need, we can create the rule:
|
1 |
$rule = New-Object System.DirectoryServices.ActiveDirectoryAccessRule($sid, $rights, $ctrlType, $guid) |
Creating an ActiveDirectoryAccessRule
In the last step, we now need to add our newly created rule to the ACL of the group. To do this, we must first read the existing ACL:
|
1 2 3 |
$group = Get-ADGroup „VL_ManagerTest“ $aclPath = "AD:\" + $group.distinguishedName $acl = Get-Acl $aclPath |
To this ACL we add our newly created rule and then overwrite the group’s ACL with our modified ACL:
|
1 2 |
$acl.AddAccessRule($rule) Set-Acl -acl $acl -path $aclPath |
With this we have it done. After updating, in the properties of the group under “managedBy” should be
- the new user stand and
- the checkbox “Manager can update membership list” must be set.
Automate group management
Less work for everyone and high secure level guarantee. For this we use the tool DynamicGroup. Thanks to powerful filters, you can set Attribute requirements for the members of your groups. For example: A group “only accept active members”. If the status of a member change to “inactive”, the member will be removed of the group. If you update the department attribute of a user to “sales”, DynamicGroup will add this user to all the groups with this requirement. You can read more details about this feature in this article: Automated permissions based on properties.
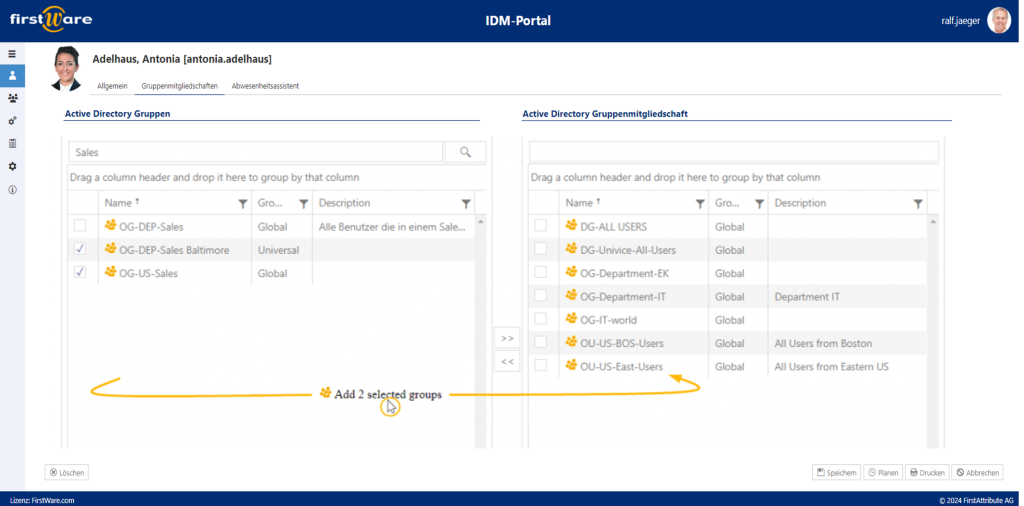
You can download and test DynamicGroup for free during 30-days here.
The complete script: Set Group Manager Permission with PowerShell
Finally, here is the complete script:
|
1 2 3 4 5 6 7 8 9 10 11 12 13 14 15 16 17 |
#Manager setzen $user = Get-ADUser darth.vader Set-ADGroup „VL_ManagerTest“ -Replace @{managedBy=$user.DistinguishedName} #RightsGuid $guid = [guid]'bf9679c0-0de6-11d0-a285-00aa003049e2' #SID des Managers $sid = [System.Security.Principal.SecurityIdentifier]$user.sid #ActiveDirectoryAccessRule erstellen $ctrlType = [System.Security.AccessControl.AccessControlType]::Allow $rights = [System.DirectoryServices.ActiveDirectoryRights]::WriteProperty -bor [System.DirectoryServices.ActiveDirectoryRights]::ExtendedRight $rule = New-Object System.DirectoryServices.ActiveDirectoryAccessRule($sid, $rights, $ctrlType, $guid) #Gruppen-ACL auslesen, neue Regel hinzufügen und ACL der Gruppe überschreiben $group = Get-ADGroup „VL_ManagerTest“ $aclPath = "AD:\" + $group.distinguishedName $acl = Get-Acl $aclPath $acl.AddAccessRule($rule) Set-Acl -acl $acl -path $aclPath |
FirstAttribute AG – Identity Management & IAM Cloud Services
We would be happy to present our services and solutions to you. Get in touch and find out how we can help you.






2 Comments
Leave your reply.