Changing upper and lower case of a dynamic DNS host entry is not easily possible in case the DNS is integrated into the Active Directory. The entry is created as soon as the machine registers in the DNS for the first time.
If the machine‘s name is written in upper case, the DNS entry will be written the same way. If however the entry should be changed to lower case you have to follow the following steps:
Index
Why it is not easy to Change the Dynamic DNS Host Entry
If you change the machine’s name the DNS entry still remains the same. Even if you erase the DNS entry and the machine registers anew there is no change. That is because there is a new entry in the AD with every entry in DNS. If you delete the entry from the DNS a tombstone in AD continues to exist. This tombstone contains the original notation of the DNS entry and it will recover as soon as the machine registers itself again.
But there is a way how you can change the notation. You need to remove the old entry from AD. Follow this manual’s four steps in order to set the dynamic host entry:
Step 1 – Renaming the Machine
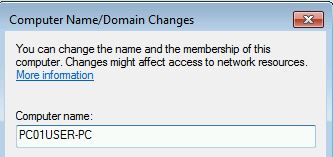
You can rename the machine by setting system properties.
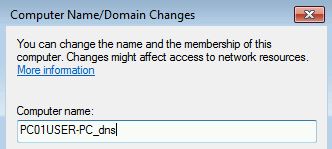
It’s best to use an extension to the machine’s name.
After remaning the computer you have to reboot it. After that you can continue with step 2.
the next step.Nachdem der Computer umbenannt wurde, muss er neugestartet werden, sodass der nächste Schritt begonnen werden kann.
Note:
It is not possible to change the letter case directly. Windows does not accept this. That is why the confirmation button remains plain grey.
Step 2 – Deleting the DNS Entry
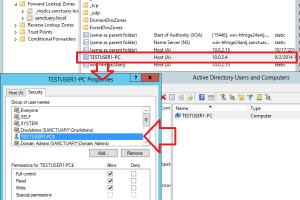
You will find the DNS entry in the Forward Lookup Zone of the DNS. There it will probably look like this:
Now you have to delete this entry. This has no impact because the computer already has been renamed and saved with a transitional name. Next you have to wait for the DNS replication or you have to start it manually.
In the mean
Step 3 – Deleting the AD Entry
If you want to delete the tombstone from the AD you need the tool ADSI Edit. Unfortunately standard AD tools can’t be used to access this entry.
In order to delete the entry you have to connect to a certain context. This is slightly different from standard and depends on the scope you chose for the zone replication.
If you replicate the zone to“ all DNS server in Active Directory forest“ the file could look exactly like follows:
DC=Zonenname,CN=MicrosoftDNS,DC=ForestDnsZones,DC=domain,DC=Domain
After filling the gaps correctly you will see this line:
DC=test.net,CN=MicrosoftDNS,DC=ForestDnsZones,DC=test,DC=net
If you replicate the zone to „all DNS servers in the Active Directory domain“ it will look like this:
DC=Zonenname,CN=MicrosoftDNS,DC=DomainDnsZones,DC=domain,DC=Domain
The line will read this, as soon as you filled all the necessary gaps:
DC=test.net,CN=MicrosoftDNS,DC=DomainDnsZones,DC=test,DC=net
If you replicate the zone to „all domain controllers in the Active Directory domain“, the path will be:
DC=Zonenname,CN=MicrosoftDNS,CN=System,DC=domain,DC=Domain
And it probably looks like this, if you filled the gaps with the right code:
DC=test.net,CN=MicrosoftDNS,CN=System,DC=test,DC=net
If you have several DNS zones you have to choose the correct one. Next you have to delete the dnsNode entry of the machine.
After that you have to wait for the replication or start it manually. This is mandatory here. After the replication has finished you can continue with the final step.
Step 4 – Correct Renaming of the Machine
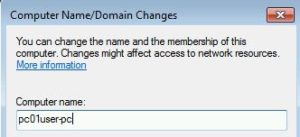
Finally you just have to repeat step 1. But this time with correct letter case and it will work perfectly fine.
After rebooting the machine it automatically registers in the DNS with its new name. So you finished your tasks with setting dynamic dns host entry.
FirstAttribute AG – Microsoft Consulting Partner for
Migration and Active Directory





Leave a Reply
<p>Your email is safe with us.<br/>Information about our <a href="https://activedirectoryfaq.com/contact-us/">data protection policies</a></p>