With Microsoft Azure you can set up virtual machines with a great range of operating systems quickly and easily. For the administration, Microsoft Azure offers a Web Management interface.
But Azure PowerShell cmdlets are even more interesting for assembling individual script libraries. Use these scripts to install virtual machines comfortably.
I’d like to use this article to explain possibilities of setting up Azure Virtual Machines with PowerShell.
Index
Preparation
Start by downloading and installing the Azure PowerShell. Installation happens via WebPlatform-Installer:
After that, Azure PowerShell will start automatically.
The next thing is to get it in touch with your Azure account. Use one of these cmdlets:
- Add-AzureAccount
- Get-AzurePublishSettingsFile and
- Import-Azure-PublishSettingsFile
I use PublishSettingsFile. With Get-AzurePublishSettingsFile, the download page for PublishSettingsFiles is requested. It can also be reached directly via the link Azure Publish Settings.
The downloaded file must be imported into the Azure PowerShell with the cmdlet Import-AzurePublishSettingsFile.
Now, Azure PowerShell is ready to communicate with your Azure environment.
Installing a Virtual Machine with Azure PowerShell
For the installation of a new machine, you usually don’t need an ISO with the operating system. Azure offers an extensive library with readily set up VMs you can use.
Now, let’s have a closer look at how Azure Virtual Machines can be administered with PowerShell.
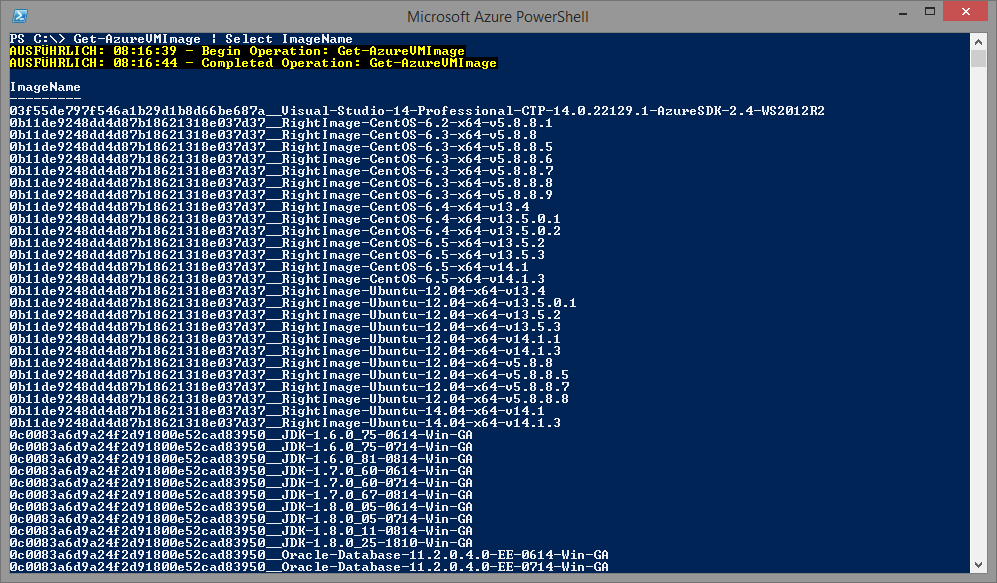
With Get-AzureVMImage | Select ImageName, you can get an overview over all presently available VMs.
In the following example, I used the recent Windows Server 2012 R2 VHD:
But first, the Storage Account has to be set for the current subscription.
|
1 2 3 |
$storeage = Get-AzureStorageAccount | Select StorageAccountName $subscription = Get-AzureSubscription | Select SubscriptionName Set-AzureSubscription -SubscriptionName $subscription.SubscriptionName -CurrentStorageAccountName $storage.StorageAccountName |
Then, the selected VHD can be saved in a variable:
|
1 |
$image = “a699494373c04fc0bc8f2bb1389d6106__Windows-Server-2012-R2-201409.01-en.us-127GB.vhd” |
Next, a new Virtual Machine configuration has to be created. It can then be modified with further settings: e.g. attach hard drives or configure endpoints. However, there also is a faster way which I am going to show later.
Our new machine “FA-TestServer” is to be created as a small instance and with the previously selected image.
|
1 |
$vm1 = New-AzureVMConfig -Name “FA-TestServer” -InstanceSize "Small" -ImageName $image |
Then, initial-settings are attached to the configuration-object for the virtual machine. In our example, the administrator-account and password should suffice for now.
|
1 |
$vm1 | Add-AzureProvisioningConfig -Windows -AdminUserName ”adm.test” -Password “P@ssw0rd!” |
Now we test whether our machine-name is already used somewhere or not.
|
1 |
Test-AzureName -service "FA-TestServer" |
Is it not used yet, we can create our configured virtual machine in the cloud-service “FA-TestCloudService”.
|
1 |
$vm1 | New-AzureVM -ServiceName "FA-TestCloudService" -Location "North Europe" |
Now, as promised, the quicker version: execute all the settings with the cmdlet “New-AzureQuickVM”:
|
1 |
New-AzureQuickVM -Windows -ServiceName FA-TestServer2 -Name FA-TestServer2 –ImageName “a699494373c04fc0bc8f2bb1389d6106__Windows-Server-2012-R2-201409.01-en.us-127GB.vhd” -InstanceSize 'Small' -AdminUserName ”adm.test” -Password “P@ssw0rd!” -Location "North Europe" |
Please contact us for any further information.


Leave a Reply
<p>Your email is safe with us.<br/>Information about our <a href="https://activedirectoryfaq.com/contact-us/">data protection policies</a></p>