Lately, I wanted to create an Active Directory test domain. It was supposed to have the exactly same content as an existing one.
That quickly confronts you with the following problem:
How can I ensure that the test directory has the same LSAP schema as the reference domain?
With board tools you can synchronize or export and import the AD schema. Especially one tool, a part of the server role AD LDS (formerly ADAM), has proven to be very helpful with that. When the role is installed, you can find a program named ADSchemaAnalyzer.exe in the folder C:\Windows\ADAM.
Index
Install AD schema as a copy of productive domain
With the tool ADSchemaAnalyze you can determine the schema difference between two LDAP directories (AD DS / AD LDS) and export them into a LDIF file. This file then has to be imported into the target directory with the tool ldifde.exe. ldifde.exe is a command line tool which exists on every domain controller.
Introduction ADSchemaAnalyzer
Because some of the used terms could be misleading, I want to explain them first.
The target schema describes the source , reference or original schema. In this case target means that the base schema has to look the same as the target.
The base schema is the schema to be edited, meaning the copy or the test AD domain. It should be expanded so it has the same contents as the target.
Tutorial: Synchronize and install LDAP schema
- Start ADSchemaAnalyzer
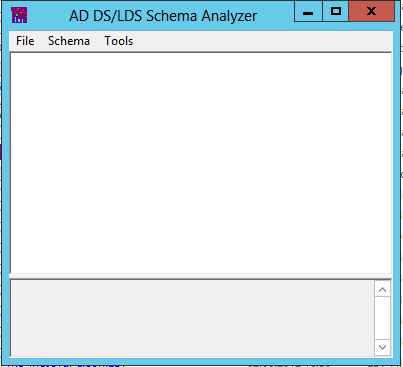
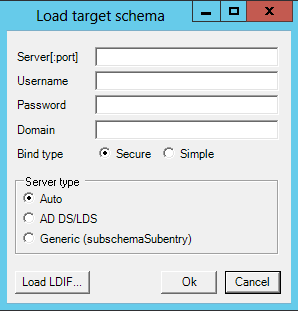
- Load schema of the target directory
File >Load target schema…
Enter user name, password and domain
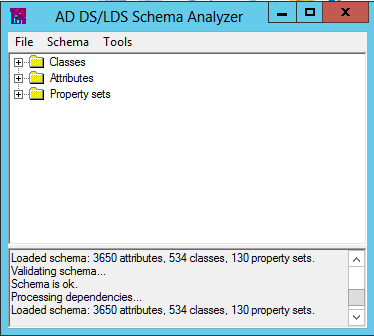
Confirm with OKThe result could look like this:
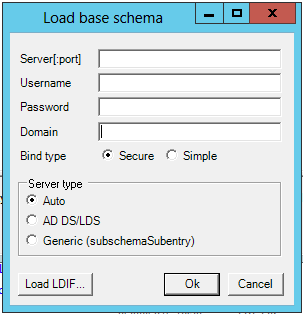
- Load schema of the test directory
File >Load base schema…
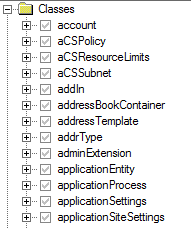
After having entered the connection data to the test directory successfully, the schema difference will be determined.The tool now shows all classes and attributes with their status.
With the option Schema >Hide present elements you can hide already existing entries.
After that, you can manually select the desired classes and attributes.
With Schema >Mark all non present elements as included you can add all missing ones.
- Then, you can create the LDIF import file via File >Create LDIF file.
Example file (short):
# ==================================================================
#
# This file should be imported with the following command:
# ldifde i u f Fa Schema.ldf s Server Name j . c “cn=Configuration,dc=X” #configurationNamingContext
# LDIFDE.EXE from AD/AM V1.0 or above must be used.
# This LDIF file should be imported into AD or AD/AM. It may not work for other directories.
#
# ==================================================================
#
# ==================================================================
# Attributes
# ==================================================================
# Attribute: faAdresse2
dn: cn=FaAdresse2,cn=Schema,cn=Configuration,dc=X
changetype: add
objectClass: attributeSchema
attributeId: 1.3.6.1.4.1.18871.1.1.1.41
ldapDisplayName: faAdresse2
attributeSyntax: 2.5.5.12
adminDisplayName: FaAdresse2
# schemaIDGUID: 21d94f36 80d8 408e a8e9 b272a0e1e8c0
schemaIDGUID:: Nk/ZIdiAjkCo6bJyoOHowA==
oMSyntax: 64
isSingleValued: TRUE
systemOnly: FALSE
…
In the head, this file already contains the command line command for Ldifde:
ldifde i u f Fa Schema.ldf s Server Name j . c “cn=Configuration,dc=X” #configurationNamingContext
It is important that the target server owns the AD role „Schema Master“ and that the executing user is schema administrator (group schema admins).
Attention:
Changes to the AD schema cannot be reversed! Check all actions thoroughly!
The author does not assume liability for data loss, undesired side effects or any other guarantees. The risk lies with the user.
Expansions to the AD enable the direct connection of other applications and systems. E.g. employee status, personnel number, cost centers etc. can thus be used.
Use the AD as the leading system for master data maintenance.
Firstware Admin enables an easy administration.





Leave a Reply
<p>Your email is safe with us.<br/>Information about our <a href="https://activedirectoryfaq.com/contact-us/">data protection policies</a></p>